Zoom Database & Preview Service on same Machine
By default when you install the Zoom package on a server machine, the Zoom Database/DAM server and the Zoom Preview Server are co-located on the same machine. Based on how your default NIC (Network Interface Card) on the server is configured, the default network settings may work out of the box. Often the network administrators wants to use a custom host name in DNS or an IP address for the services. Follow this section to configure the network settings correctly.
- Choose the DNS hostname or an IP address that you want the end-user to see when accessing the Zoom Database or Preview service. For the rest of this section, the desired hostname will be zoom.mytestdomain.com
- Either login into the Zoom Server machine and go to Web Management Console port on the Zoom Server:
http://localhost:8443or from a remote web browser go tohttp://<ip-address-zoom-server-if-accessible>:8443if the specified IP address can be used to connect to the Zoom Server administration service. - Click on the Server Control Panel -> Network Settings:
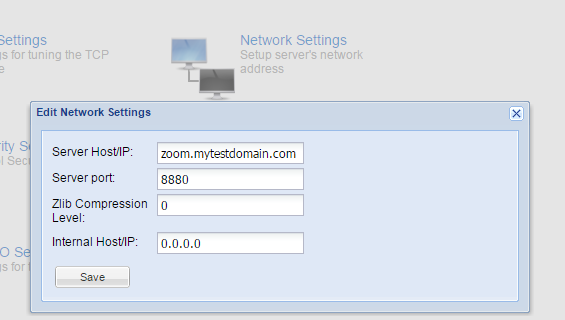
- Change the Server Host/IP to the desired name such as zoom.mytestdomain.com. Do not change the Internal Host/IP unless you want to bind the port to a specific NIC.
- Save and restart the service.
- Go back to the Web Management Console port on the Zoom Server, this time click on Server Control Panel -> Admin Server Config
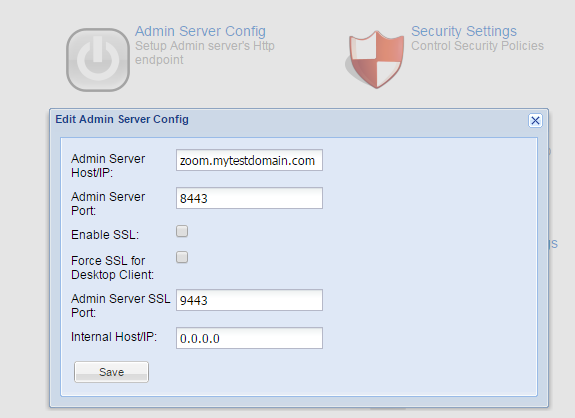
- Change the Admin Server Host/IP to the desired name such as zoom.mytestdomain.com. Do not change the Internal Host/IP unless you want to bind the port to a specific NIC.
- Make sure that your Zoom Server and Zoom Preview Server services are stopped.
- Navigate to
[ZoomInstallPath]/conf/. - Open the
server.xmlfile for editing. - Search for a section called
<reviewserverspec>. - Under the tag
<ServerConnection>change the host and/or port (std or SSL) to the hostname/IP of the Zoom server machine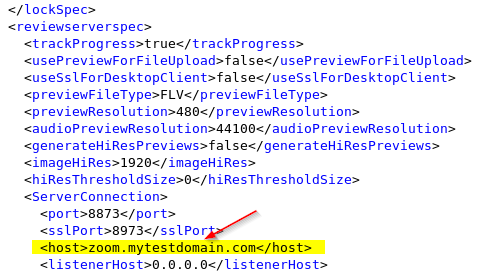
- Save and close file.
- Finally, open the
preview-server.xmlfile for editing. - Change the hostname in the
zoomServerHostPortandwebminHostPorttag, to the Zoom server machine host/IP name: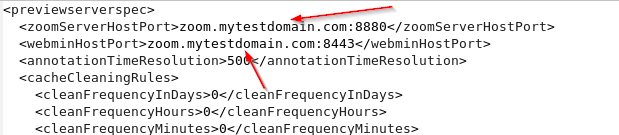
- Save and close the file
- Restart both Zoom & Preview service.
Verifying the Zoom Server Settings
- Open a command terminal on any Zoom Client desktop machine that has the Zoom Client installed
- Run the command:
zm -s http://<mydam-server>:8880 getcredentialsin the terminal - Confirm that the Preview Server parameter:
rv_serveris pointing to the Zoom Server host/IP address - Confirm that the wbm_server host name is pointing to the Zoom Server host/IP address
Zoom Database & Preview Service on different Machines
By default when you install the Zoom package on a server machine, the Zoom Database/DAM server and the Zoom Preview Server are co-located on the same machine.
For performance reasons, Enterprises that wish to dedicate separate server machine for each server can do so by following the steps below. Any number of Preview Servers can be setup to connect with a single Zoom Database/DAM servers.
Pointing Database Server to a Preview Server
- Make sure that your Zoom Server and Zoom Preview Server services are stopped.
- Navigate to [ZoomInstallPath]/conf/.
- Open the server.xml file for editing.
- Search for a section called
<reviewserverspec>. - Under the tag
<ServerConnection>change the host and/or port (std or SSL) to the Preview Server machine: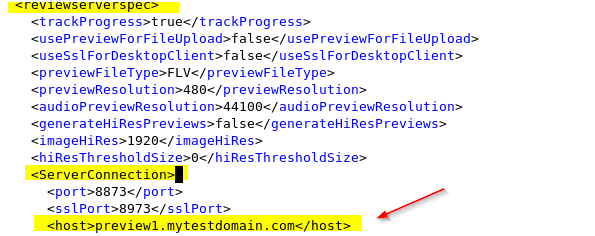
- Save and close the file.
- Start the Zoom Server
- Stop and disable the Zoom Preview Service on the Database server machine as it is going to be setup on a different Preview Server machine now.
Pointing Preview Server to the Database Server
- Login to the Preview Server machine
- Make sure that your Zoom Preview service is stopped.
- Navigate to [ZoomInstallPath]/conf/.
- Open the preview-server.xml file for editing.
- Search for a section called
<previewserverspec>. - Edit the value for tags
<zoomServerHostPort>and<webminHostPort>to point to the Zoom DAM server host:port:
- Save and close file.
- Start the Zoom Preview Server
- Stop and disable the Zoom Database Service on the Preview server machine as it is going to be setup on a different Database Server machine now.
Verifying the Preview Server Settings
- Open a command terminal on any Zoom Client desktop machine that has the Zoom Client installed
- Run the command:
zm -s http://<mydam-server>:8880 getcredentialsin the terminal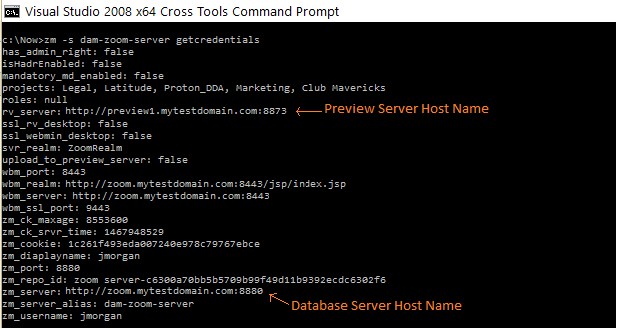
- Confirm that the Preview Server parameter:
rv_serveris pointing to the Zoom Preview Server machine