
Install Adobe Extension
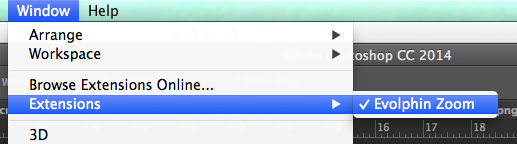
If you do not see an Evolphin Zoom panel under Window > Extensions > Evolphin Zoom, install the plugin manually using Installing Creative App Plugin .
Links in After Effects
Checkin Assets
Smart Copy/Clone Project
Within Zoom, creating copies of files is easy using Smart Copy. Unlike conventional copying of files which takes up additional data, creating a Smart Copy allows a file to be copied and edited without having to duplicate data on the server. You can create smart copies of a file or an entire folder. For additional information on Smart Copy, see Smart Copy Assets .
- Save your current document.
- Open the Evolphin Zoom panel by navigating to Window > Extensions > Evolphin Zoom.
Window > Extensions > Evolphin Zoom - Zoom 7.0: Click Fly-out menu > Clone Project

Zoom 6.0 or below: Click Smart Copy.
- Choose Server URL.
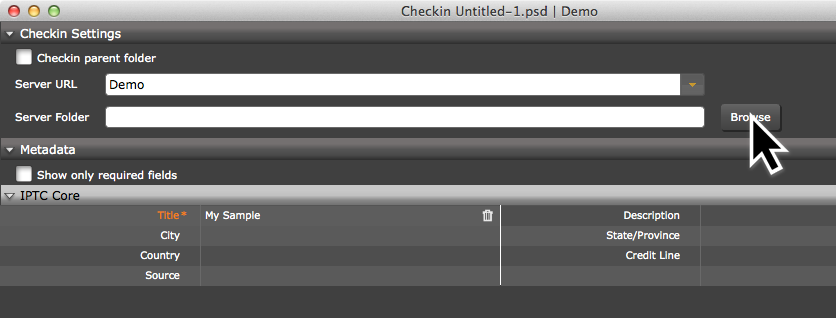
Check Browse – Checkin Dialog - Click Browse to choose the location in Zoom to checkin the asset.
- Fill out any required metadata or keyword values.
- Enable or disable Convert to working copy.
- Click Smart Copy.
Lock/Unlock
Revert/Revert Project
Update/Sync
Task Manager
The Task Manager allows users who have the Workflow module to accept and submit tasks assigned to them within a Workflow Job. The Task Manager can be launched directly from with the Creative App Plugin.
- Open the Evolphin Zoom panel by navigating to Window > Extensions > Evolphin Zoom.
Window > Extensions > Evolphin Zoom - Click Task Manager.
- Click OK.
Show in Asset Browser/View in Zoom
Status
Reveal/View in Explorer/Finder
Resolve Links
Resolve Links functionality, available in the Creative app panel can be used to replace broken/unversioned links in the main with the links in the working copy. It works on a file that was checked into Zoom Server along with all its links. Resolve links will not work properly if the links have been re-ordered. So, if there is a need to re-order the links in the main file, make sure to issue Resolve Links before re-ordering.
- Open the file for which you need to Resolve Links in the appropriate Creative App.
- Open the Evolphin Zoom panel by navigating to Window > Extensions > Evolphin Zoom.
- Make sure that the linked files are also checked out in your machine.
- Zoom 7.0: Via the fly-out menu, Click Resolve Links.

Zoom 6.0 or below: Click Resolve Links.

Resolve Links best practices:
- Scenario – There is a PhotoShop file Main.psd. It has links to ~/Desktop/links/Link1.jpg and ~/Desktop/links/Link2.jpg. Main.psd is checked-in to Zoom along-with the links and with Convert to WC checked. In this case, Main.psd, Link1.jpg, and Link2.jpg will all get checked into Zoom Server and the versioned copy of Main.psd would open up in PhotoShop. After check-in, resolve links will automatically run so that the links of Main.psd get updated to the versioned copies of Link1.jpg and Link2.jpg instead of the original link files in ~/Desktop/links. If it fails in any case, make sure to click on Resolve Links manually.
- Resolve links would look for files in the order – third party mount points, auto-checkout mount points, working copy. This means if you want to resolve paths only from the working copy, make sure auto-checkout mount point and third party mount points do not have copies of your linked files. For high-res files, by default the links will be resolved in the order of high-res, mid-res, low-res(auto-checkout mount point, working copy).
Render and Import
For Adobe After Effects, Zoom ships with a script for automating the render and import process. The script can be installed as a menu option under the File → Scripts panel in Adobe After Effects.
Installing the Render and Import Script
- Find the ZmAfterEffectsRenderScript.zip file. This is located in the Evolphin Zoom install directory, under the DAM\plug-ins folder. If you aren’t sure where you had installed Evolphin Zoom, then please ask an administrator
- Windows (32-bit): C:\ Program Files\Evolphin\DAM\plug-ins
- Windows (64-bit): C:\Program Files (x86)\Evolphin\DAM\plug-ins
- MacOS: /Applications/Evolphin/zoom/Resources/plug-ins
- Unzip the file to your Adobe After Effects Scripts folder. This can be found in the location you installed Adobe After Effects, under the Support Files\Scripts folder on Windows, or /Resources/Support Files/Scripts. If you aren’t sure where this can be found, ask your administrator
- Windows : C:\Program Files\Adobe\Adobe After Effects CC 2015\Support Files\Scripts
- MacOS: /Applications/Adobe After Effects CC 2015/Scripts
You should end up with Evolphin Zoom – Render and Import.jsx under the Scripts folder.
- Launch After Effects and look for the script named Evolphin Zoom – Render and Import.jsx under the File -> Scripts menu:


Running the Render and Import script
- Make sure that the default server is set in Z-settings-> Server/WC Settings.

- If mandatory metadata is enabled in the server, ensure that a default Metadata Preset saved. Click here to know how to save default Metadata Preset.
- Before launching the script, ensure the Adobe After Effects render settings are specified in the Zoom Settings panel (launched from the desktop via the “Z” icon context menu):

“Import destination” points to the project root folder or the sub-folder under which rendered files will be saved automatically. - In After Effects preferences, make sure ”Allow Scripts to Write Files and Access Network” checkbox is selected. Without this option, Zoom script will be unable to communicate with the Zoom DAM service.

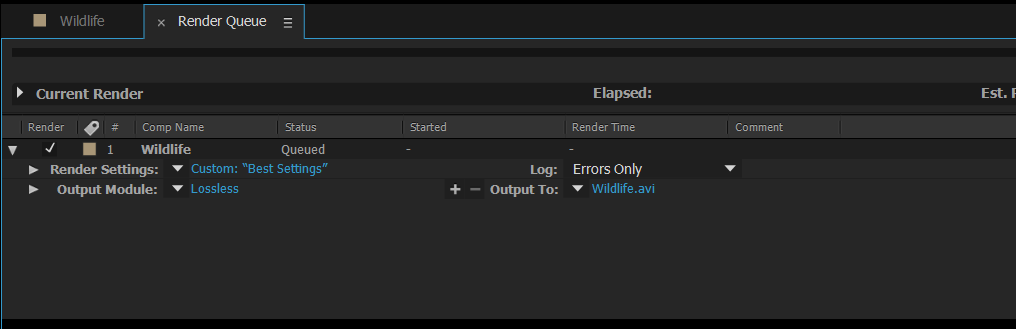
- Set up the After Effects render queue by adding items to the render queue, along with output modules.
- Next, click on the Evolphin Zoom – Render and Import.jsx under the File menu to start rendering. Once rendering is finished, Zoom will trigger check-in, you will see the check-in dialog popup, and execute automatically. Once the import is finished, notifications will pop up in the system tray or Mac menu bar.

- Adobe After Effects will also pop up an alert:

- During the import, if an output file does not exist, it would be ignored, and the rest of the files would be imported. Zoom will create a subfolder based on the project name.
