Ingest Files using Zoom Desktop
In this article, you will learn how to ingest graphics, images & project files that are not classified as high-res media by Zoom.
Overview
Zoom provides multiple ways to ingest files to your repository. As a content creator, you can ingest your files using Zoom Desktop. Alternatively, Media Managers can ingest media directly from a URL (such as media stored in an Amazon S3 bucket), or perform in-place ingest. Both of these approaches are ideal for handling large volumes of assets, which is typically the key requirement for a lot of Media Managers.
Let us consider this example:
You have retouched images and graphics files locally on your system that you want to ingest into the Zoom repository. These files are not large and can be ingested into the Zoom server as ordinary files via:
Before you begin
See the “About Ingest” article for the various ways in which you can ingest assets, their use cases, and benefits.
Prerequisites
- You must be a member of the Project Vault you are planning to ingest files into.
- You must be a member of a role with at least the “Contribute” permissions to the Project Vault.
- You must have a desktop license assigned by the administrator
- Your desktop client settings are configured with a location and the Zoom server URL
Benefits
This feature allows you to:
- Preserve folder structure upon ingest.
- Fill in metadata before ingest.
- Create revisions from modified files
- Automatically save revisions as incremental changes using our unique Frontend Deduplication
Option 1: Ingest files using Easy Upload
- Open Zoom Desktop.
- On the home page, under “EASY UPLOAD” click SHARE A FILE.
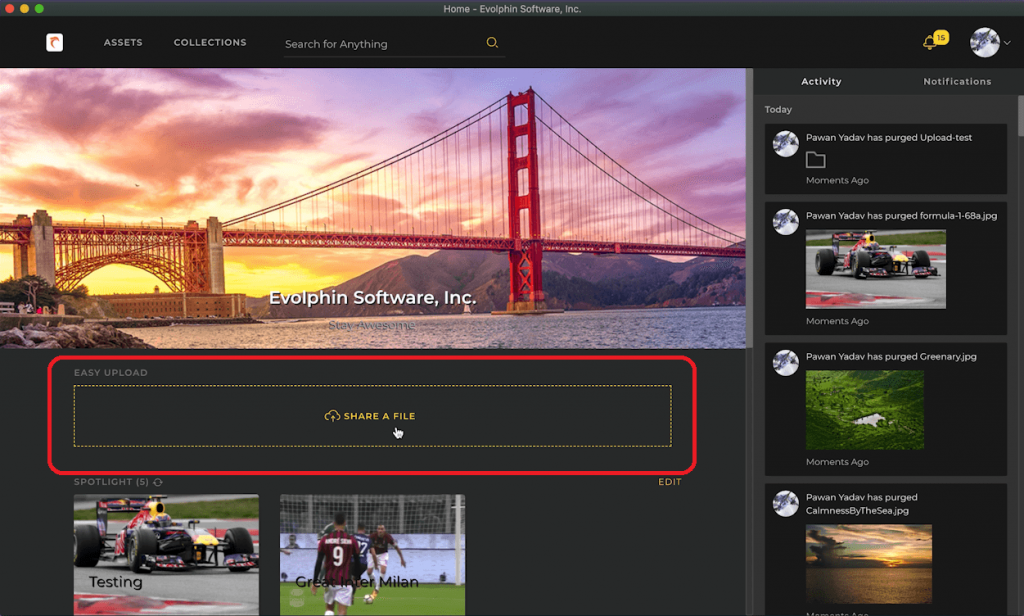
- Select the files or assets and click Open.
- In the Check-in dialog, click Browse to select the server folder to which you want to upload or ingest the files.
- Select the folder and click OK.
- Alternatively, you can also create a folder at this step. To do so, click Add Folder, provide a name for the new folder, and click OK.
- Click Check-In.
Results
The progress dialog displays the status of the upload operation.
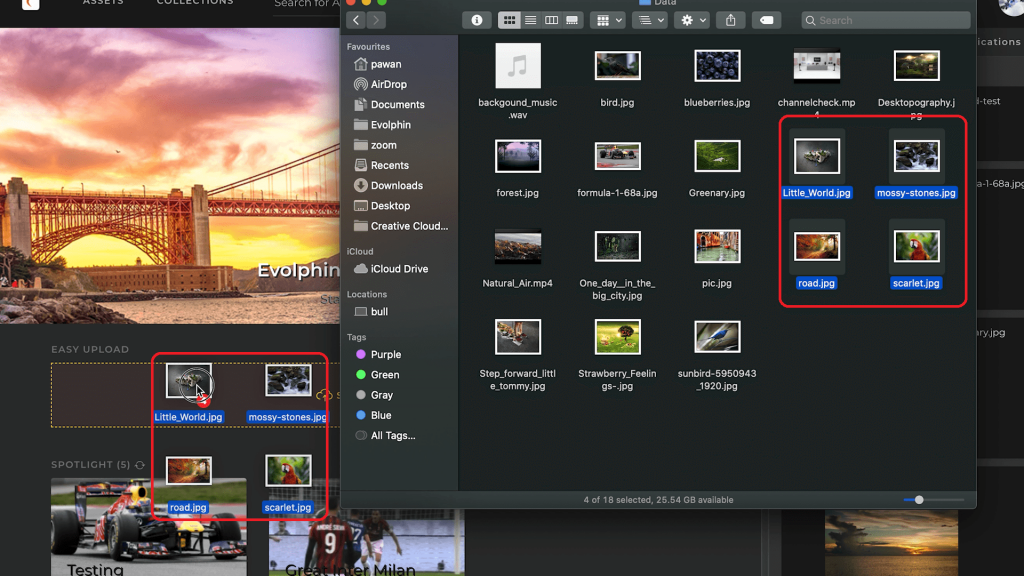
Option 2: Drag-and-drop to ingest files
- Open Zoom Desktop.
- Select the files or assets and click Open.
- Open Mac Finder or Windows Explorer and navigate to the files you want to upload.
- Select the files and drag-and-drop the files into the “EASY UPLOAD” region into Zoom Desktop.
- In the Check-in dialog, click Browse to select the server folder to which you want to upload or ingest the files.
- Select the folder and click OK.
- Alternatively, You can also create a folder at this step. To do so, click Add Folder, provide a name for the new folder, and click OK.
- Click Check-In.
Results
The progress dialog displays the status of the upload operation.
Tips & Tricks
Permission denied error
Why it happens?
When you try to ingest a file into a Zoom project vault, you see the the permission denied error message.
If you do not have at least Contribute permissions in the Zoom project vault you are ingesting into, you will run into this error.
How to fix?
Your administrator needs to assign you to a role with at least Contribute permission in order to let you ingest files into that vault.
- Last modified on